Версия SoftEther VPN Server 4.20.9608 (стабильный релиз, т.е. не beta) — softether-vpnserver_vpnbridge-v4.20-9608-rtm-2016.04.17-windows-x86_x64-intel.exe. Версия ОС – Windows 7 Professional x64 SP1. SoftEther VPN Server — сервер VPN на Windows установка и настройка Программный продукт SoftEther VPN Server позволяет легко и быстро получить VPN сервер на Windows. Это позволяет объединить различные устройства, сервера и компьютеры в одну.
Версия SoftEther VPN Server 4.20.9608 (стабильный релиз, т.е. не beta) — softether-vpnserver_vpnbridge-v4.20-9608-rtm-2016.04.17-windows-x86_x64-intel.exe.
Версия ОС – Windows 7 Professional x64 SP1.
Программный продукт SoftEther VPN Server позволяет легко и быстро получить VPN сервер на Windows. Это позволяет объединить различные устройства, сервера и компьютеры в одну сеть (виртуальную). При этом все эти устройства могут физически находиться где угодно в мире. В статье рассмотрена установка и настройка SoftEther VPN Server на Windows. SoftEther VPN Server является freeware продуктом.
Обычно VPN сервер используют для организации удалённого доступа в сеть предприятия из дома или других удалённых сетей (офисов) организации. Так же в эту сеть могут подключаться любые другие устройства которым разрешен доступ, например мобильный телефон. Т.е. можно с мобильного телефона войти на рабочий стол своего рабочего компьютера. Поэтому, часто, VPN сервер – это центральный узел, к которому подключаются клиенты, чтобы получить доступ во внутреннюю сеть предприятия.
Установка SoftEther VPN Server на Windows
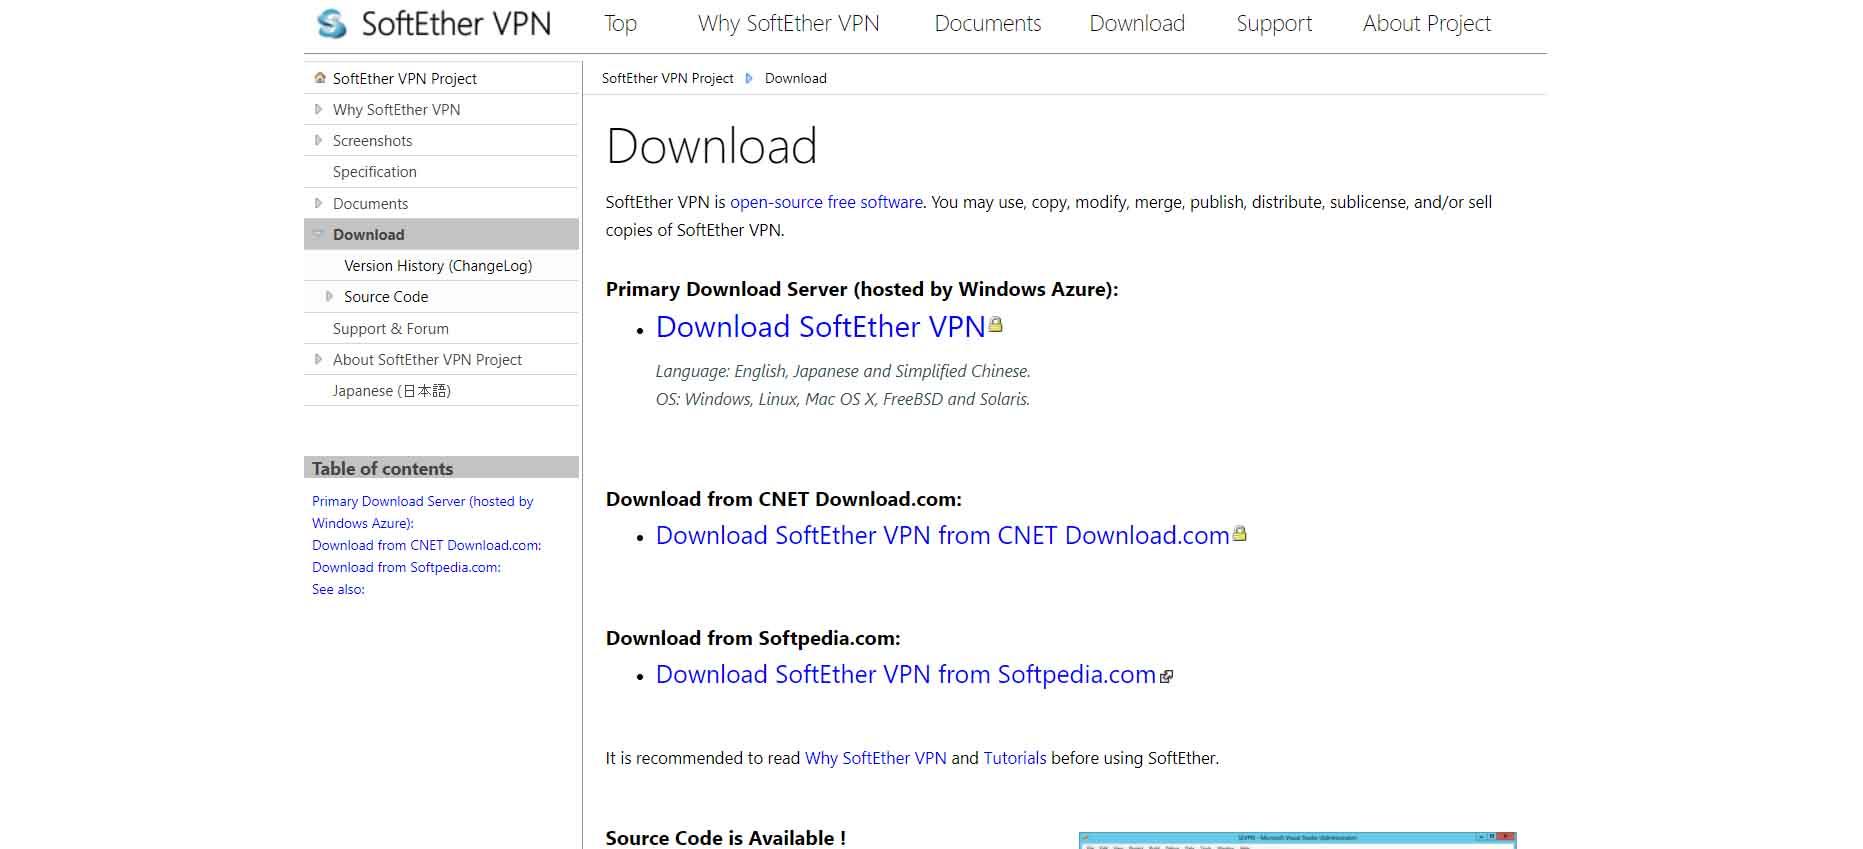
Дистрибутив можно взять отсюда — SoftEther Download Center. Обратите внимание, что на странице загрузок сначала отображаются бета (beta) версии продукта.

Скачать и запустить — softether-vpnserver_vpnbridge-v4.20-9608-rtm-2016.04.17-windows-x86_x64-intel.exe

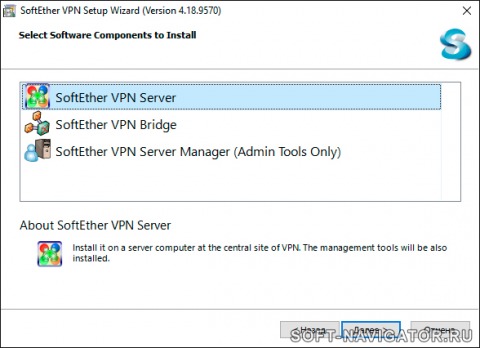
Здесь выбрать — SoftEther VPN Server.
SoftEther VPN Server Manager (Admin Tools Only) – можно установить не сам сервер, а только средства его администрирования, например на рабочую станцию администратора.
SoftEther VPN Bridge — SoftEther VPN Server может работать в режиме моста между сетями (в этой статье не рассматривается).

Согласиться с лицензией

Здесь описаны все самые ключевые технические детали – можно почитать.

Здесь можно выбрать папку куда будет установлен SoftEther VPN Server и выбрать для конкретного пользователя он будет установлен или для всех пользователей на компьютере.

Далее идёт установка. После чего будет предложено запустить SoftEther VPN Server Manager для того что произвести настройку VPN.

Настройка SoftEther VPN Server
SoftEther VPN Server Manager всегда можно запустить Start – All Programs — SoftEther VPN Server — SoftEther VPN Server Manager.
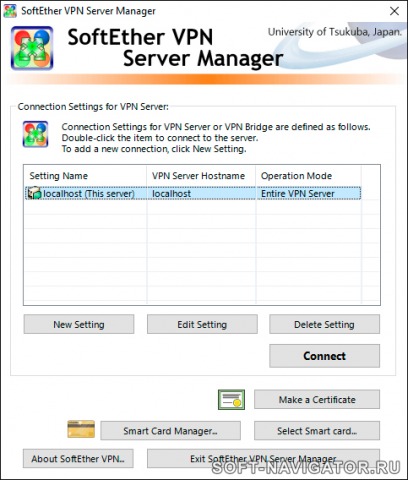
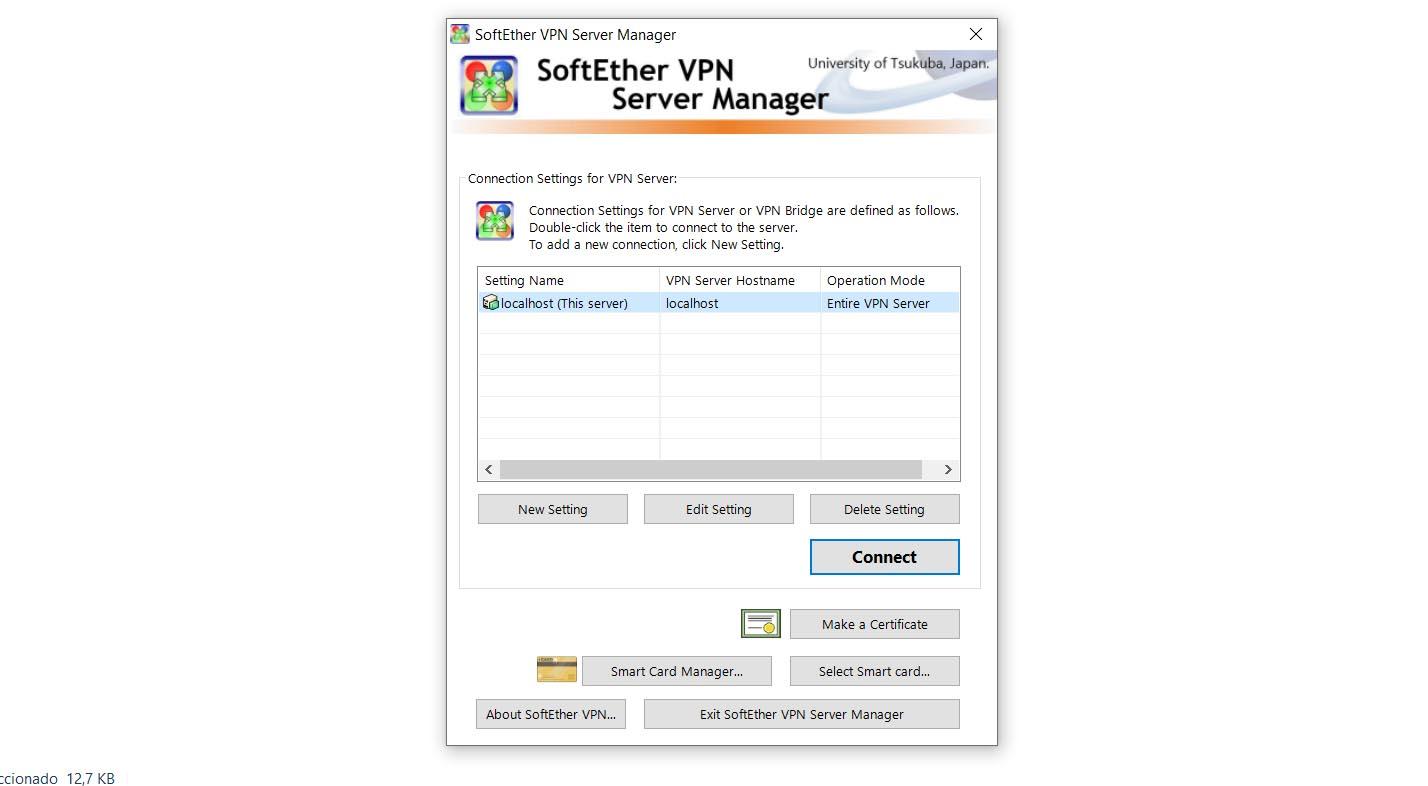
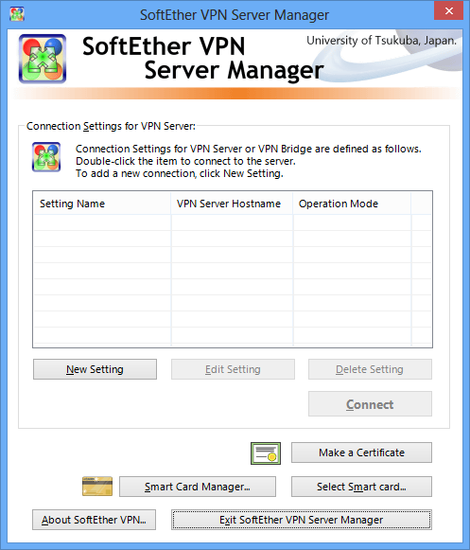
При старте у вас отобразиться список соединений с SoftEther VPN Server серверами. Здесь можно создавать новые соединения или менять параметры уже существующих соединений. Для этого нужно выбрать конкретное соединение (в данном примере оно одно) и нажать Edit Setting.

Здесь можно задать настройки для конкретного соединения.
1. Название соединения
2. Имя сервера где установлен SoftEther VPN Server или его ip-адрес + порт.
3. Прямое соединение с сервером или через прокси.
4. Это соединение с сервером или хабом. В этой статье рассматривается одиночный сервер, поэтому – Server Admin Mode.
5. Можно сохранить пароль чтобы его не задавать каждый раз. Это пароль для администрирования сервера.

Соединиться с сервером. Для этого на основном экране SoftEther VPN Server Manager нажать Connect. При первом соединении, запуститься мастер, который поможет настроить сервер VPN.
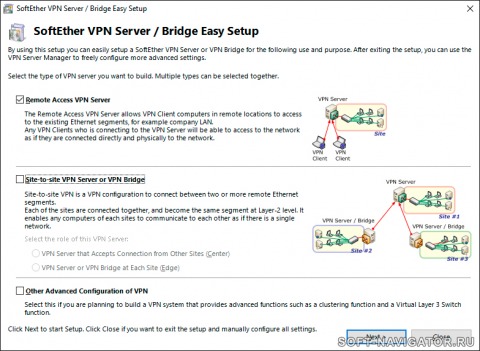
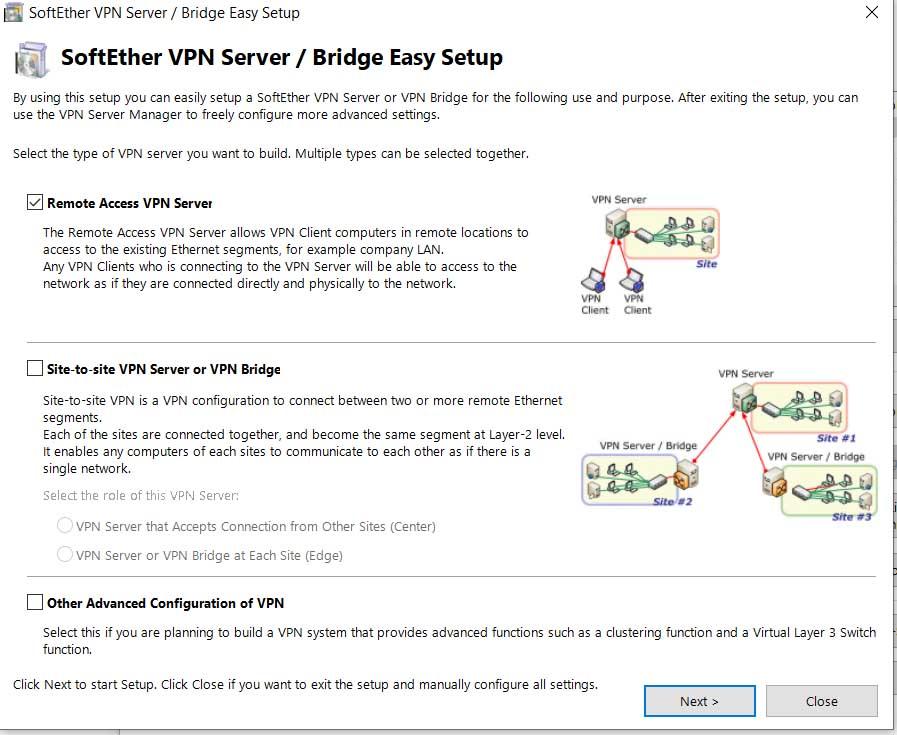
Выбрать Remote Access VPN Server.

Далее запрашивается подтверждение нашего выбора. Нажать – Yes.

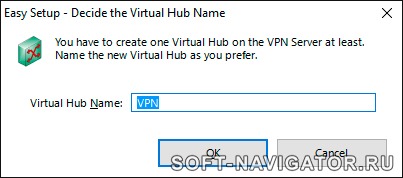
Здесь вводиться имя виртуального хаба (это как-будто железка к которой все присоединяются). Оставить всё как есть.

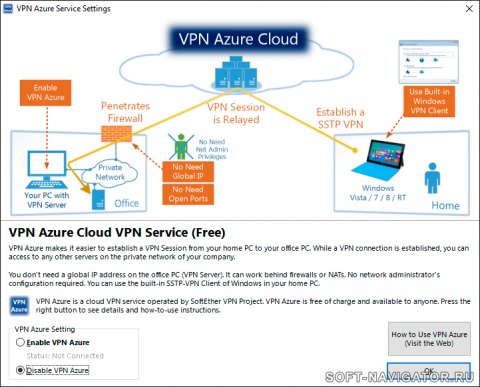
Можно настроить соединение с Azure Cloud. В этой статье это не рассматривается, поэтому выбрать Disable VPN Azure.

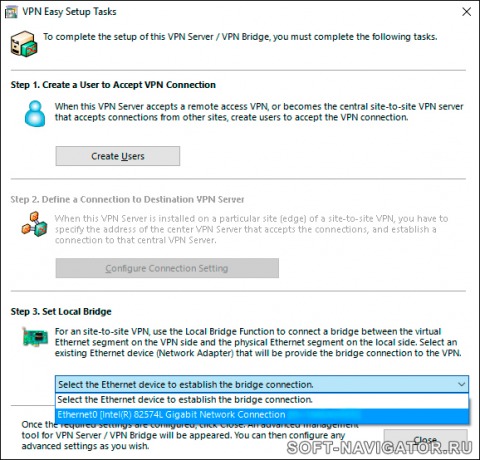
Далее появляется еще одни мастер VPN Easy Setup Tasks.
Выбрать в пункте 3 сетевую карту на сервере, которая смотрит в интернет.
Также необходимо создать пользователя под которым все будут соединяться с VPN сервером. Можно одного на всех или для каждого своего.

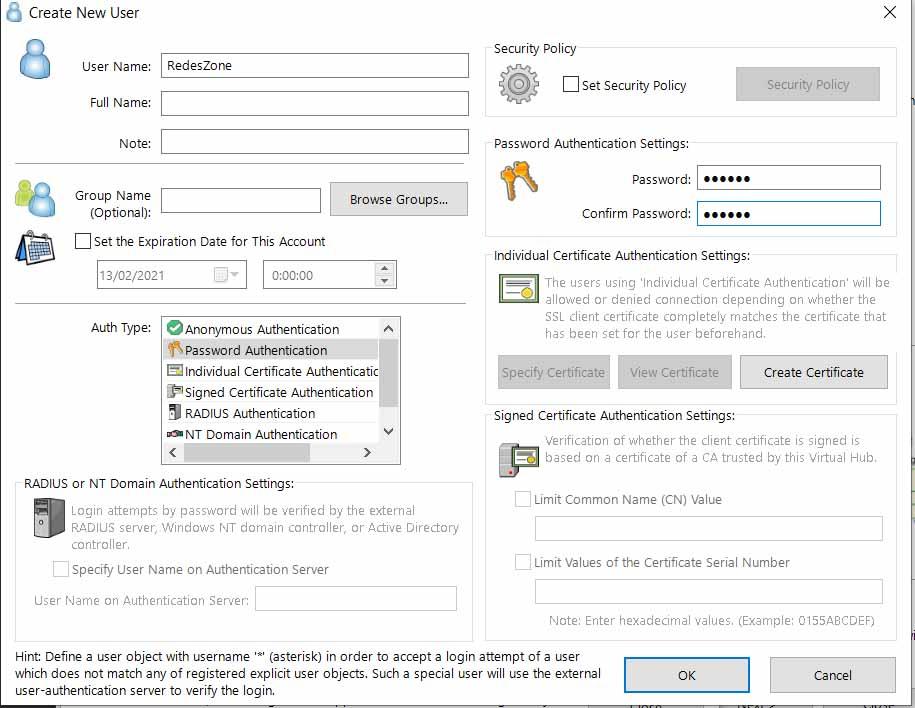
Для создания пользователя нажать Create User. На рисунке выделены поля для создания пользователя с аутентификацией по паролю.
1. Ввести имя пользователя
2. Можно установить группу для пользователя и дату истечения этой учётной записи (т.е. доступ кому-то можно предоставлять на некоторое время).
3. Выбрать тип аутентификации – Password Authentication.
4. Для пользователя можно регулировать конкретные разрешения.
5. Задать пароль пользователю.
6. Можно управлять индивидуальным сертификатом для аутентификации для конкретного пользователя.
7. Настройки для подписанного сертификата.

Далее появиться форма Manage Users где можно создать еще пользователей. Если это не нужно – нажать Exit.

Выйти из формы VPN Easy Setup Tasks — нажать Close.
Если вы устанавливаете SoftEther VPN Server на виртуальный сервер, может появиться следующее окно. В котором предупреждается что нужно убедиться что для этой виртуальной машины Promiscuous Mode включен и не запрещён. Если это не так – его нужно включить и разрешить.

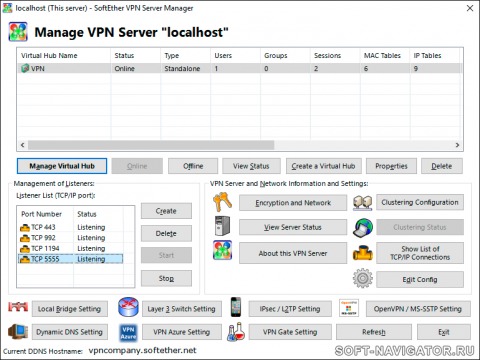
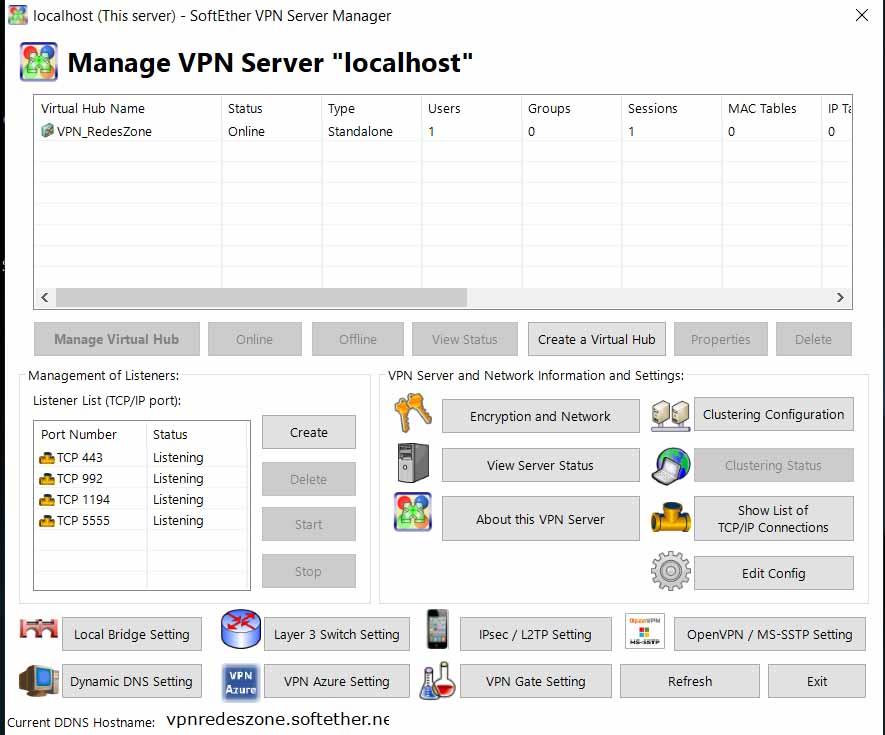
Всё сервер готов к работе и теперь при соединений с сервером через SoftEther VPN Server Manager вы будете видеть вот такое окно.
Если вы меняете порты через которые соединяться пользователи – откройте эти порты в любом firewall которые у вас есть между клиентом и сервером. В firewall операционной системы Windows при установке SoftEther VPN Server Manager автоматически создаётся правило для C:Program FilesSoftEther VPN Servervpnserver_x64.exe.

Соединение клиентов с SoftEther VPN Server
Для соединения клиентов с SoftEther VPN Server можно использовать как встроенные средства ОС использующие подключение по протоколу L2TP/IPsec с общим ключом так и собственного клиента SoftEther VPN Client. Который как заявляют разработчики, работает быстрее и шифрует трафик с помощью SSL. Т.е. VPN может работать даже в сетях где протоколы отличные от HTTPS запрещены.
This section describes how to install SoftEther VPN Server to an operating system with Windows 2000 or later. This assumes that in the Windows operating system, no extra application software is installed after performing a clean install of the system. This also assumes that the Windows function for blocking communication to TCP/IP ports from the outside (firewall function) is disabled.
7.2.1 Selecting the Installation Mode
As described in 3.2 Operating Modes, SoftEther VPN Server can be operated in either service mode or user mode. When configuring VPN Server for use as part of an everyday operation system, we recommend installing SoftEther VPN Server in service mode. The installer for the Windows version of VPN Server installs the VPN Server program to the system in service mode.
7.2.2 Installation Procedure Using the Installer
Preparing the Installer File
The installation of the Windows version of SoftEther VPN Server is very easy as it is almost completely performed automatically. To install VPN Server, you can download the latest VPN Server installer file from the SoftEther VPN Project website (http://www.softether.org/).
The VPN Server Windows version installer file is an executable file with the name vpnserver-build-number-win32-x86.exe.
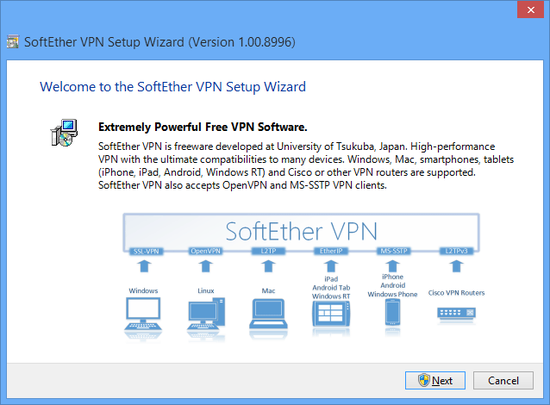
VPN Server Installer
Starting the Installer
Start the installer by double-clicking the VPN Server installer file. The Windows Installer-based installer starts automatically. Using the installation wizard, you can select the name of the installation directory. (By default, the program is installed to Program FilesSoftEther VPN Server on the system drive.) The VPN Server process writes large log files to the installation directory, so we recommend selecting an area on the hard drive that has high transfer rate and a large amount of unused space.

Specifying the VPN Server Installation Directory.
During the installation, the end-user license agreement may be displayed. Please thoroughly read the agreement. If you agree to the terms and conditions, the installation continues.
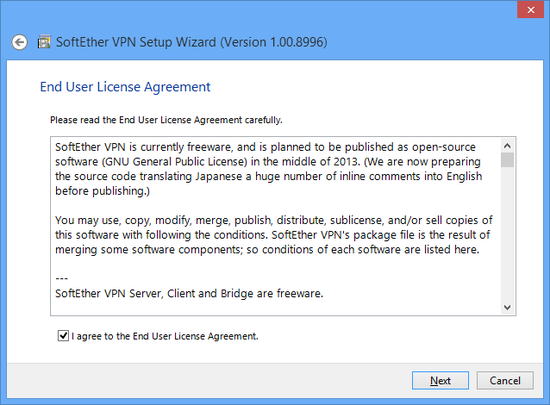
VPN Server End-User License Agreement.
The installer automatically registers the SoftEther VPN Server system service and sets the program to automatically start in background mode at Windows startup.
7.2.3 Precautions After Installation
When installation of the Windows version of VPN Server is completed, the SoftEther VPN Server service is already running in the background on the Windows system. Normally, the computer does not have to be restarted after installation of the program. However, if you expect to use the local bridge function while using a network adapter that supports hardware offloading, as described in 3.6 Local Bridges, we recommend that you restart the computer.
To check whether the VPN Server installer properly installed the SoftEther VPN Server service to the Windows system, click [Control Panel] > [Administrative Tools] > [Services], and check that [SoftEther VPN Server] is displayed on the list of services.
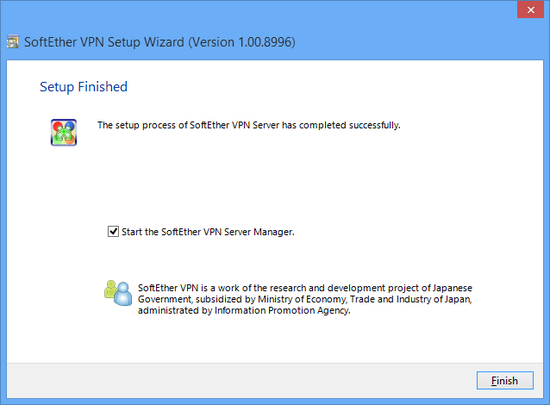
VPN Server Install Finished.
7.2.4 Managing VPN Server with VPN Server Manager
VPN Server Manager
After VPN Server is installed, the program can be properly configured and the VPN client computers can be provided with the function that allows the program to operate as a VPN server.
SoftEther VPN Server Manager can be used on Windows to manage VPN Server. For information about the detailed management method, please refer to 3. SoftEther VPN Server Manual.
Start VPN Server Manager, which is installed at the same time as the Windows version of VPN Server, connect to [localhost] (the host itself) on the server window, and configure the default settings.
To configure or manage the Linux or other Unix version of VPN Server, you can also use the Windows version of VPN Server Manager from a remote computer. For information about manually installing VPN Server Manager on a computer without VPN Server installed, please refer to 2.4 VPN Server Manager.
Default Settings of VPN Server Manager
When VPN Server Manager is started for first time, nothing is registered to the [SoftEther VPN Server Connection Settings] list on the startup window.
VPN Server Manager.
To create a connection setting, click [Create New Setting] and specify the host name, port number, and other information of VPN Server to which to establish a management connection. Once a connection setting is registered, it is displayed the next time VPN Server Manager is started.

Window for Creating a Connection Setting.
After creating a connection setting, double-click that connection setting to try to connect to VPN Server.
7.2.5 Managing with vpncmd
You can also use the command line-based vpncmd software to configure and manage VPN Server. This is helpful in cases where VPN Server is installed to a Linux or other Unix operating system and a separate Windows computer is not available locally, therefore VPN Server Manager cannot be used. In this case, you can use vpncmd to configure the default settings. You can also use vpncmd to configure the settings on the Windows version of VPN Server. For information about detailed vpncmd operations, please refer to 6. Command Line Management Utility Manual.
SoftEther VPN Project recommends using VPN Server Manager on a Windows computer to configure and manage VPN Server and using vpncmd as a supplemental management utility for automating simple repetitive tasks.
7.2.6 Starting and Stopping Service
The installer for the Windows version of VPN Server automatically installs the SoftEther VPN Server service. This service continually operates while Windows is running, and it automatically shuts down when Windows shuts down.
If the service must be restarted for management reasons or because VPN Server operations become unstable, you can click [Control Panel] > [Administrative Tools] > [Services], and start or stop the service. An easier and more reliable method is to call the net command at the command prompt and start or stop the service.
To stop the service, type the following command.
To start the service, type the following command.
If, in the unlikely event, the VPN Server process hangs and cannot be controlled using the net command, you can use Task Manager in Windows to forcibly terminate the vpnserver.exe process.
7.2.7 Adding and Deleting the Service
You can add or delete the service for the vpnserver.exe process using the method described in the description of the service mode of the Windows SoftEther VPN Server in 3.2 Operating Modes. You can use this method, for example, to move all setting files in the VPN Server installation directory to a different directory or hard drive, and then re-register the process as a service. (However, we cannot recommend using this method as the uninstaller may not be able to properly uninstall the program.)
7.2.8 Limitations When Starting in User-mode
We recommend operating the Windows version of VPN Server as a service mode program, but you can also start VPN Server in the user mode by using the method described in 3.2 Operating Modes. When VPN Server is started in user mode, critical security holes, such as buffer overruns, exist temporarily on the VPN Server, but because only user accounts starting VPN Server in user mode would be affected if an attack were to occur, VPN Server can be used relatively securely and safely. However, SoftEther VPN Project does not recommend actually operating VPN Server in user mode for the following reasons.
- The local bridge function cannot be used. (For details, please refer to 3.6 Local Bridges.)
- Some features of the disaster recovery function, such as automatic recovery when an error occurs in a self process, cannot be used. (For details, please refer to 3.3 VPN Server Administration.)
- To start the VPN Server process in user mode, the user must remained logged on to the server. The user cannot operate VPN Server when the user logs off or when no users are logged on to the server after Windows starts. For these reasons, user mode is not suited for actual operation of VPN Server.
SoftEther VPN Server Tutorial
This tutorial should help you build a VPN Server using a DigitalOcean Droplet. The same steps should apply to instances
on AWS and Azure. In case you choose to build the server on AWS or Azure, you will also need to setup the security group
and firewall settings to allow the ports that will be exposed through ufw . I will highlight such information within
the steps as needed.
Required Skills
- Basic knowledge of networking
- Familiarity with Linux terminal and commands
Cost & Benefits
This will cost you about $5/month. The differences between this tutorial and buying VPN from a service provider are:
- You can create unlimited number of accounts for friends and family
- If you’re a business, you can create accounts for the whole company
- In cases where VPN providers are blocker by IP range, your Droplet is not within that range
- In case where specific protocols are blocked, you can use SSTP or IP-over-DNS
Table of contents
- Creating the Droplet
- Performing Initial Server Setup
- Server Hardening
- SoftEther Server Installation
- IPsec/L2TP Setup (SoftEther Server Administration GUI)
- Certificate Setup
- SSTP Setup
- Windows 10 Client Configuration
- iOS Client Configuration
- MacOS Client Configuration
- Android Client Configuration
- Ubuntu 19 Client Configuration
1. Creating the Droplet
- Login to DigitalOcean. If you don’t have an account, sign up and do the initial setup
- Create a new Droplet
- In the page that following, ensure that you select
- Distribution: Ubuntu 18.xx (LTS)
- Plan: Standard, $5/month (you may need a bigger droplet if you are a business)
- Block Storage: Do not add any
- Data Center: You may want to pick Frankfurt or New York. I’ll explain when to pick which one of them below
- Additional Options: We don’t need any
- Authentication: One-time Password
- Finalize & Create: 1 Droplet, pick the name that you like
- Other options can stay default
- Click Create
- You will receive an email with the password and the IP of the new Droplet
Which Region Do I Pick?
For the Middle East: This depends on why you need the VPN. If you are interested in speed only, pick Frankfurt. The VPN server will make your
geolocation appear to websites and services as if it was the location of the VPN server. If you wish to appear as if you
are in the United States, then pick New York.
How Does It Look Like?

2. Performing Initial Server Setup
In this step, we will do the following:
- Update Ubuntu
- Create a new user instead of the root user
- Install Friendly Editor (optional)
- Disable root access
- Add swap file
- Optimize server performance (slightly)
For the next steps, you will need a Terminal window. If you are on Windows, the easiest way to get this is to use the «Git Bash»
terminal which comes with the standard Git for Windows. Linux & Mac users can use the built-in
Terminal.
2.1 Update Ubuntu
In the email that I received, the IP address for my new Droplet is 161.35.1.111. In my terminal, issue the commands:
ssh root@161.35.1.111 # You will be asked to enter the password from the email # and to create a new password. apt update && apt -y dist-upgrade # When prompted to pick configuration, pick the choice to leave maintainer defaults reboot
The server will now reboot. In a few seconds, we will connect to it again in order to continue the setup
2.2 Create a new user instead of the root user
ssh root@161.35.1.111 adduser softether usermod -aG sudo softether
We’ve just created a new user called softether. Let’s test that we can use it instead of root.
OPEN A NEW TERMINAL and then
ssh softether@161.35.1.111 sudo apt update # If this command works, then our new user works fine! If it doesn't review the steps above. # We can now disable the root user.
2.3. Install Friendly Editor (optional)
The following step is for users with little Linux experience. If you know how to use vim or nano , you may skip
this step and use any of them whenever we need to edit some file. I will be using mcedit within this document for
those who are unfamiliar with vi and nano
2.4. Disable root access
Open a Terminal and ssh as root.
DO NOT CLOSE THIS TERMINAL UNTIL THIS STEP is 100% done!*
ssh root@161.35.1.111 ssh softether@161.35.1.111 sudo mcedit /etc/ssh/sshd_config
- Press F7 and search for PermitRootLogin yes
- Change it to PermitRootLogin no
- Press F2 to save
- Press F10 to quit
If you made mistakes or typos, press ESC , do not save and try again
sudo service sshd restart # Leave this Window Open
In a new Terminal, let’s try and see if our configuration worked
ssh root@161.35.1.111 # This should FAIL
ssh softether@161.35.1.111 # This should SUCCEED
2.5. Add swap file
In this step, we’ll create a swapfile, enable it and add it to /etc/fstab so that it’s enabled by default on next reboots
sudo fallocate -l 1G /swapfile sudo chmod 600 /swapfile sudo mkswap /swapfile sudo swapon /swapfile echo '/swapfile none swap sw 0 0' | sudo tee -a /etc/fstab
2.6. Optimize server performance (slightly)
Tell Linux to us swap as little as possible
sudo sysctl vm.swappiness=10 sudo sysctl vm.vfs_cache_pressure=50
Let’s make sure this is done automatically when the system reboots, too.
sudo mcedit /etc/sysctl.conf
- scroll to the bottom and add the lines
vm.swappiness = 10 vm.vfs_cache_pressure=50
3. Server Hardening
I will not go into details about the Ubuntu server hardening as there are many guides over the internet. We will just
perform the minimal hardening which should be sufficient in most cases.
Install fail2ban which will block brute force attacks
sudo apt -y install fail2ban
Ensure that firewall is only allowing the ports that we need
sudo ufw allow OpenSSH sudo ufw allow 443 sudo ufw allow 992 sudo ufw allow 1194 sudo ufw allow 5555 sudo ufw allow 500/udp sudo ufw allow 1701/udp sudo ufw allow 4500/udp sudo ufw allow 1723/tcp
NOTE: If you’re using AWS or Azure, the port above will need to be open.
* OpenSSH is listening on port 22
Enable the firewall
4. SoftEther Server Installation
Let’s start by installing the SoftEther server and basic commands
sudo apt-add-repository -y ppa:paskal-07/softethervpn sudo apt update sudo apt -y install softether-vpnserver
And start the SoftEther VPN server
sudo service softether-vpnserver start
Now go to http://www.softether-download.com/en.aspx?product=softether and download
SoftEther VPN Server Manager for Windows without installers — if you’re on Mac, you may download the Mac version. Linux users should download
the Windows version and run it with wine . This is how my download screen looks like after selecting the appropriate options.

- Extract the zip file
- Run vpnsmgr.exe
- Click «New Setting»
- Enter a name for your «Setting Name» field
- Add the IP Address of your Droplet in the «Host Name» field
- Click OK

You should now return to the main screen. Click «Connect». You will be prompted to create a password for managing the
VPN server. Please ensure that you create a secure password. Once this is done, the GUI will automatically start a configuration wizard.
5. IPSEC/L2TP Setup (SoftEther Server Administration GUI)
- Once the Wizard starts, select the option for «Remote Access VPN Server»


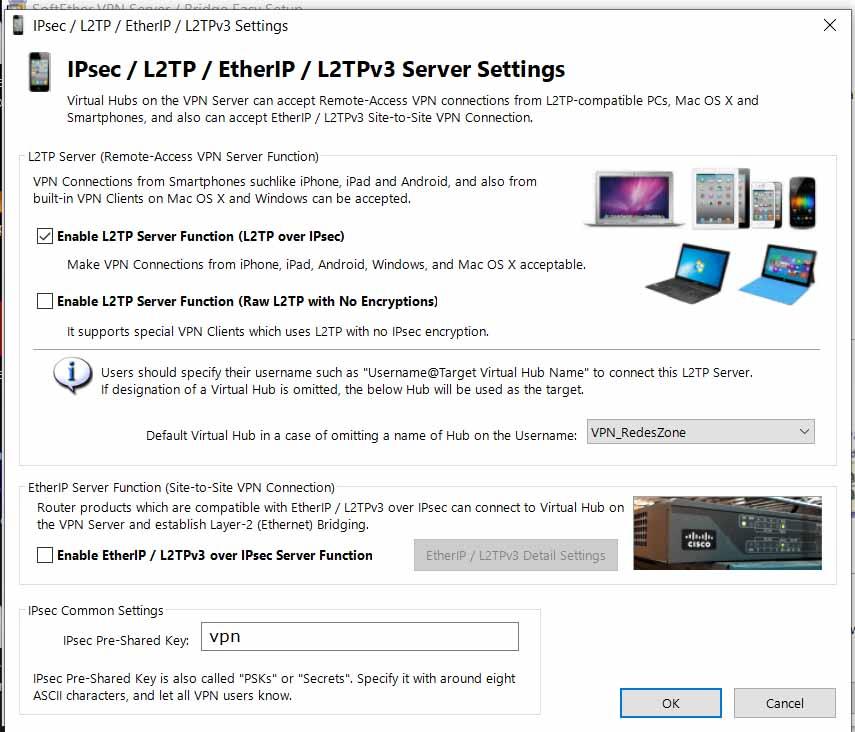
- Check the «Enable L2TP Server Function (L2TP over IPSec)».
- Ensure that all other check boxes are unchecked
- Note the IPsec Pre-shared key at the bottom. You can change it now or later if you wish


- Click «Create Users»
- In «User Name»: Enter username for connection
- In «Password»: Enter password for this user
- Click OK

- You may receive a warning regarding Promiscuous Mode. You can safely ignore this warning.
- In this screen, click «Enable SecureNAT»
At this point, you should test the IPSec/L2TP connection by configuring a client.
Try any of the following clients:- Windows 10 Client Configuration
- iOS Client Configuration
- MacOS Client Configuration
- Android Client Configuration
- Ubuntu 19 Client Configuration
Once you’ve verified that the IPSec/L2TP connection works, proceed to the configuration of the «Let’s Encrypt»
certificate in Certificate Setup.6. Certificate Setup
The hostname that I got assigned is vpn225930509.softether.net . You can check yours from the GUI by clicking
«Dynamic DNS Setting» in the «Virtual HUB Manager» (Step 5.7)We will also need a valid email address. Let’s use this value in the commands below.
sudo apt -y install certbot sudo ufw allow http # Then run the command # sudo certbot certonly --standalone -n -d (your host name) --agree-tos --email "(your email address)" # In this example, I ran the following command sudo certbot certonly --standalone -n -d vpn225930509.softether.net --agree-tos --email "(my email address)"
NOTE: If you’re using AWS or Azure, you’ll need to open port 80
The results were two files in:
/etc/letsencrypt/live/vpn225930509.softether.net/fullchain.pem /etc/letsencrypt/live/vpn225930509.softether.net/privkey.pem
NOTE: YOUR PATH WILL BE DIFFERENT. IT WILL BE BASED ON YOUR HOSTNAME
The format is:
/etc/letsencrypt/live/< HOST NAME >/fullchain.pem
/etc/letsencrypt/live/< HOST NAME >/privkey.pem
Let’s load those two files:
vpncmd localhost:5555 /server /CMD ServerCertSet /LOADCERT:/etc/letsencrypt/live/vpn225930509.softether.net/fullchain.pem /LOADKEY:/etc/letsencrypt/live/vpn225930509.softether.net/privkey.pem
Let’s Encrypt will provide us with a three month certificate. Let’s ensure that we renew on time…
sudo mcedit /etc/cron.monthly/renew_cert.sh
- Copy and paste the text into the file and replace the missing fields.
#!/bin/sh certbot renew vpncmd localhost:5555 /server /PASSWORD:[*** YOUR SERVER PASSWORD ***] /CMD ServerCertSet /LOADCERT:/etc/letsencrypt/live/[*** YOUR SERVER NAME ***]/fullchain.pem /LOADKEY:/etc/letsencrypt/live/[*** YOUR SERVER NAME ***]/privkey.pem
Let’s test the renewal script
chmod +x /etc/cron.monthly/renew_cert.sh /etc/cron.monthly/renew_cert.sh
The script should run and say that
- The cert doesn’t need to be updated.
- The cert (in this case, the one that currently exists) has been loaded.
If this is the case, your server is ready to be used with SSTP and even current L2TP/IPSec is also using the new «real» cert..
7. SSTP Setup
NOTE: In order for SSTP to work, you will need to setup a certificate as defined in the previous step (Certificate Setup)
and to access the server by the hostname instead of the IP address. SSTP will verify the certificate. While IPSec/L2TP can use self-signed certificate
which comes with the default installation, SSTP will not!In the main script for Server Manager, click «OpenVPN / MS-SSTP Setting». It should open the following screen
Ensure the «Enable MS-SSTP VPN Clone Server Function» is checked and click OK. You can now use this from Windows 7 and above
by simply changing the connection type to Automatic.Note: When you connect from Windows, you must use the hostname instead of the IP so that SSL validation doesn’t fail
Note for Mac users: There are multiple SSTP clients available for download that you can use with this feature.8. Windows 10 Client Configuration
- Open Network and Internet Settings
- Click VPN
- Click «Add a VPN Connection»
- Pre-shared key (from step 5.4)
- Username: Same username that you created (from step 5.6)
- Password: Same password that you created (from step 5.6)
9. iOS Client Configuration
- Open the Settings App, tap «VPN» and tap «Add VPN Configuration»
- Description: Name of the connection
- Server: IP Address of the server (or hostname)
- Account: Username from step (from step 5.6)
- RSA SecureID: off
- Password: Password from step (from step 5.6)
- Secret: Pre-shared key (from step 5.4)
10. MacOS Client Configuration
- Open the Network Settings and click the «+» sign at the bottom.
- Interface: VPN
- VPN Type: L2TP over IPSec
- Service Name: Type in the connection name
- Server Address: Put in the hostname or IP address
- Account Name: Username (from step 5.6)
- Click «Authentication Settings»
- Enter the password (from step 5.6)
- Shared Secret: Pre-shared key (from step 5.4)
11. Android Client Configuration
- Open the Settings App, tap «VPN» and tap «Add VPN Profile»
- Name: Name of the connection
- Type: Select L2TP/IPSec PSK
- Server address: IP or hostname of the VPN server
- L2TP Secret: leave empty
- IPSec Identifier: leave empty
- IPSec pre shared key: Pre-shared key (from step 5.4)
- Username: Username (from step 5.6)
- Password: Password (from step 5.6)
12. Ubuntu 19 Client Configuration
- Open a Terminal and install IPSec/L2TP for Network Manager
sudo apt install network-manager-l2tp network-manager-l2tp-gnome
- Click «Network»
- On the VPN frame, click «+»
- Choose «Layer 2 Tunnelling Protocol (L2TP)»
- Name: Connection Name
- Gateway: IP or hostname of the VPN server
- Username: Username (from step 5.6)
- Password: Password (from step 5.6)
- Check «Enable IPSec tunnel to L2TP host»
- Gateway ID: Leave empty
- Pre-shared key: Pre-shared key (from step 5.4)
- Phase 1 Algorithms: Enter aes256-sha1-ecp384,aes128-sha1-ecp256,3des-sha1-modp1024!
- Phase 2 Algorithms: Enter aes256-sha1,aes128-sha1,3des-sha1!
- Check «Use Point-to-Point encryption (MPPE)»
- Check «Allow stateful encryption»
- Click OK
SoftEther VPN Server Tutorial
This tutorial should help you build a VPN Server using a DigitalOcean Droplet. The same steps should apply to instances
on AWS and Azure. In case you choose to build the server on AWS or Azure, you will also need to setup the security group
and firewall settings to allow the ports that will be exposed through ufw . I will highlight such information within
the steps as needed.Required Skills
- Basic knowledge of networking
- Familiarity with Linux terminal and commands
Cost & Benefits
This will cost you about $5/month. The differences between this tutorial and buying VPN from a service provider are:
- You can create unlimited number of accounts for friends and family
- If you’re a business, you can create accounts for the whole company
- In cases where VPN providers are blocker by IP range, your Droplet is not within that range
- In case where specific protocols are blocked, you can use SSTP or IP-over-DNS
Table of contents
- Creating the Droplet
- Performing Initial Server Setup
- Server Hardening
- SoftEther Server Installation
- IPsec/L2TP Setup (SoftEther Server Administration GUI)
- Certificate Setup
- SSTP Setup
- Windows 10 Client Configuration
- iOS Client Configuration
- MacOS Client Configuration
- Android Client Configuration
- Ubuntu 19 Client Configuration
1. Creating the Droplet
- Login to DigitalOcean. If you don’t have an account, sign up and do the initial setup
- Create a new Droplet
- In the page that following, ensure that you select
- Distribution: Ubuntu 18.xx (LTS)
- Plan: Standard, $5/month (you may need a bigger droplet if you are a business)
- Block Storage: Do not add any
- Data Center: You may want to pick Frankfurt or New York. I’ll explain when to pick which one of them below
- Additional Options: We don’t need any
- Authentication: One-time Password
- Finalize & Create: 1 Droplet, pick the name that you like
- Other options can stay default
- Click Create
- You will receive an email with the password and the IP of the new Droplet
Which Region Do I Pick?
For the Middle East: This depends on why you need the VPN. If you are interested in speed only, pick Frankfurt. The VPN server will make your
geolocation appear to websites and services as if it was the location of the VPN server. If you wish to appear as if you
are in the United States, then pick New York.How Does It Look Like?
2. Performing Initial Server Setup
In this step, we will do the following:
- Update Ubuntu
- Create a new user instead of the root user
- Install Friendly Editor (optional)
- Disable root access
- Add swap file
- Optimize server performance (slightly)
For the next steps, you will need a Terminal window. If you are on Windows, the easiest way to get this is to use the «Git Bash»
terminal which comes with the standard Git for Windows. Linux & Mac users can use the built-in
Terminal.2.1 Update Ubuntu
In the email that I received, the IP address for my new Droplet is 161.35.1.111. In my terminal, issue the commands:
ssh root@161.35.1.111 # You will be asked to enter the password from the email # and to create a new password. apt update && apt -y dist-upgrade # When prompted to pick configuration, pick the choice to leave maintainer defaults reboot
The server will now reboot. In a few seconds, we will connect to it again in order to continue the setup
2.2 Create a new user instead of the root user
ssh root@161.35.1.111 adduser softether usermod -aG sudo softether
We’ve just created a new user called softether. Let’s test that we can use it instead of root.
OPEN A NEW TERMINAL and then
ssh softether@161.35.1.111 sudo apt update # If this command works, then our new user works fine! If it doesn't review the steps above. # We can now disable the root user.
2.3. Install Friendly Editor (optional)
The following step is for users with little Linux experience. If you know how to use vim or nano , you may skip
this step and use any of them whenever we need to edit some file. I will be using mcedit within this document for
those who are unfamiliar with vi and nano2.4. Disable root access
Open a Terminal and ssh as root.
DO NOT CLOSE THIS TERMINAL UNTIL THIS STEP is 100% done!*
ssh root@161.35.1.111 ssh softether@161.35.1.111 sudo mcedit /etc/ssh/sshd_config
- Press F7 and search for PermitRootLogin yes
- Change it to PermitRootLogin no
- Press F2 to save
- Press F10 to quit
If you made mistakes or typos, press ESC , do not save and try again
sudo service sshd restart # Leave this Window OpenIn a new Terminal, let’s try and see if our configuration worked
ssh root@161.35.1.111 # This should FAILssh softether@161.35.1.111 # This should SUCCEED2.5. Add swap file
In this step, we’ll create a swapfile, enable it and add it to /etc/fstab so that it’s enabled by default on next reboots
sudo fallocate -l 1G /swapfile sudo chmod 600 /swapfile sudo mkswap /swapfile sudo swapon /swapfile echo '/swapfile none swap sw 0 0' | sudo tee -a /etc/fstab
2.6. Optimize server performance (slightly)
Tell Linux to us swap as little as possible
sudo sysctl vm.swappiness=10 sudo sysctl vm.vfs_cache_pressure=50
Let’s make sure this is done automatically when the system reboots, too.
sudo mcedit /etc/sysctl.conf
- scroll to the bottom and add the lines
vm.swappiness = 10 vm.vfs_cache_pressure=50
3. Server Hardening
I will not go into details about the Ubuntu server hardening as there are many guides over the internet. We will just
perform the minimal hardening which should be sufficient in most cases.Install fail2ban which will block brute force attacks
sudo apt -y install fail2ban
Ensure that firewall is only allowing the ports that we need
sudo ufw allow OpenSSH sudo ufw allow 443 sudo ufw allow 992 sudo ufw allow 1194 sudo ufw allow 5555 sudo ufw allow 500/udp sudo ufw allow 1701/udp sudo ufw allow 4500/udp sudo ufw allow 1723/tcp
NOTE: If you’re using AWS or Azure, the port above will need to be open.
* OpenSSH is listening on port 22
Enable the firewall
4. SoftEther Server Installation
Let’s start by installing the SoftEther server and basic commands
sudo apt-add-repository -y ppa:paskal-07/softethervpn sudo apt update sudo apt -y install softether-vpnserver
And start the SoftEther VPN server
sudo service softether-vpnserver start
Now go to http://www.softether-download.com/en.aspx?product=softether and download
SoftEther VPN Server Manager for Windows without installers — if you’re on Mac, you may download the Mac version. Linux users should download
the Windows version and run it with wine . This is how my download screen looks like after selecting the appropriate options.- Extract the zip file
- Run vpnsmgr.exe
- Click «New Setting»
- Enter a name for your «Setting Name» field
- Add the IP Address of your Droplet in the «Host Name» field
- Click OK
You should now return to the main screen. Click «Connect». You will be prompted to create a password for managing the
VPN server. Please ensure that you create a secure password. Once this is done, the GUI will automatically start a configuration wizard.5. IPSEC/L2TP Setup (SoftEther Server Administration GUI)
- Once the Wizard starts, select the option for «Remote Access VPN Server»
- Check the «Enable L2TP Server Function (L2TP over IPSec)».
- Ensure that all other check boxes are unchecked
- Note the IPsec Pre-shared key at the bottom. You can change it now or later if you wish
- Click «Create Users»
- In «User Name»: Enter username for connection
- In «Password»: Enter password for this user
- Click OK
- You may receive a warning regarding Promiscuous Mode. You can safely ignore this warning.
- In this screen, click «Enable SecureNAT»
At this point, you should test the IPSec/L2TP connection by configuring a client.
Try any of the following clients:- Windows 10 Client Configuration
- iOS Client Configuration
- MacOS Client Configuration
- Android Client Configuration
- Ubuntu 19 Client Configuration
Once you’ve verified that the IPSec/L2TP connection works, proceed to the configuration of the «Let’s Encrypt»
certificate in Certificate Setup.6. Certificate Setup
The hostname that I got assigned is vpn225930509.softether.net . You can check yours from the GUI by clicking
«Dynamic DNS Setting» in the «Virtual HUB Manager» (Step 5.7)We will also need a valid email address. Let’s use this value in the commands below.
sudo apt -y install certbot sudo ufw allow http # Then run the command # sudo certbot certonly --standalone -n -d (your host name) --agree-tos --email "(your email address)" # In this example, I ran the following command sudo certbot certonly --standalone -n -d vpn225930509.softether.net --agree-tos --email "(my email address)"
NOTE: If you’re using AWS or Azure, you’ll need to open port 80
The results were two files in:
/etc/letsencrypt/live/vpn225930509.softether.net/fullchain.pem /etc/letsencrypt/live/vpn225930509.softether.net/privkey.pem
NOTE: YOUR PATH WILL BE DIFFERENT. IT WILL BE BASED ON YOUR HOSTNAME
The format is:
/etc/letsencrypt/live/< HOST NAME >/fullchain.pem
/etc/letsencrypt/live/< HOST NAME >/privkey.pem
Let’s load those two files:
vpncmd localhost:5555 /server /CMD ServerCertSet /LOADCERT:/etc/letsencrypt/live/vpn225930509.softether.net/fullchain.pem /LOADKEY:/etc/letsencrypt/live/vpn225930509.softether.net/privkey.pem
Let’s Encrypt will provide us with a three month certificate. Let’s ensure that we renew on time…
sudo mcedit /etc/cron.monthly/renew_cert.sh
- Copy and paste the text into the file and replace the missing fields.
#!/bin/sh certbot renew vpncmd localhost:5555 /server /PASSWORD:[*** YOUR SERVER PASSWORD ***] /CMD ServerCertSet /LOADCERT:/etc/letsencrypt/live/[*** YOUR SERVER NAME ***]/fullchain.pem /LOADKEY:/etc/letsencrypt/live/[*** YOUR SERVER NAME ***]/privkey.pem
Let’s test the renewal script
chmod +x /etc/cron.monthly/renew_cert.sh /etc/cron.monthly/renew_cert.sh
The script should run and say that
- The cert doesn’t need to be updated.
- The cert (in this case, the one that currently exists) has been loaded.
If this is the case, your server is ready to be used with SSTP and even current L2TP/IPSec is also using the new «real» cert..
7. SSTP Setup
NOTE: In order for SSTP to work, you will need to setup a certificate as defined in the previous step (Certificate Setup)
and to access the server by the hostname instead of the IP address. SSTP will verify the certificate. While IPSec/L2TP can use self-signed certificate
which comes with the default installation, SSTP will not!In the main script for Server Manager, click «OpenVPN / MS-SSTP Setting». It should open the following screen
Ensure the «Enable MS-SSTP VPN Clone Server Function» is checked and click OK. You can now use this from Windows 7 and above
by simply changing the connection type to Automatic.Note: When you connect from Windows, you must use the hostname instead of the IP so that SSL validation doesn’t fail
Note for Mac users: There are multiple SSTP clients available for download that you can use with this feature.8. Windows 10 Client Configuration
- Open Network and Internet Settings
- Click VPN
- Click «Add a VPN Connection»
- Pre-shared key (from step 5.4)
- Username: Same username that you created (from step 5.6)
- Password: Same password that you created (from step 5.6)
9. iOS Client Configuration
- Open the Settings App, tap «VPN» and tap «Add VPN Configuration»
- Description: Name of the connection
- Server: IP Address of the server (or hostname)
- Account: Username from step (from step 5.6)
- RSA SecureID: off
- Password: Password from step (from step 5.6)
- Secret: Pre-shared key (from step 5.4)
10. MacOS Client Configuration
- Open the Network Settings and click the «+» sign at the bottom.
- Interface: VPN
- VPN Type: L2TP over IPSec
- Service Name: Type in the connection name
- Server Address: Put in the hostname or IP address
- Account Name: Username (from step 5.6)
- Click «Authentication Settings»
- Enter the password (from step 5.6)
- Shared Secret: Pre-shared key (from step 5.4)
11. Android Client Configuration
- Open the Settings App, tap «VPN» and tap «Add VPN Profile»
- Name: Name of the connection
- Type: Select L2TP/IPSec PSK
- Server address: IP or hostname of the VPN server
- L2TP Secret: leave empty
- IPSec Identifier: leave empty
- IPSec pre shared key: Pre-shared key (from step 5.4)
- Username: Username (from step 5.6)
- Password: Password (from step 5.6)
12. Ubuntu 19 Client Configuration
- Open a Terminal and install IPSec/L2TP for Network Manager
sudo apt install network-manager-l2tp network-manager-l2tp-gnome
- Click «Network»
- On the VPN frame, click «+»
- Choose «Layer 2 Tunnelling Protocol (L2TP)»
- Name: Connection Name
- Gateway: IP or hostname of the VPN server
- Username: Username (from step 5.6)
- Password: Password (from step 5.6)
- Check «Enable IPSec tunnel to L2TP host»
- Gateway ID: Leave empty
- Pre-shared key: Pre-shared key (from step 5.4)
- Phase 1 Algorithms: Enter aes256-sha1-ecp384,aes128-sha1-ecp256,3des-sha1-modp1024!
- Phase 2 Algorithms: Enter aes256-sha1,aes128-sha1,3des-sha1!
- Check «Use Point-to-Point encryption (MPPE)»
- Check «Allow stateful encryption»
- Click OK
20:03, 10.03.2016
Рассмотрим установку и настройку VPN сервера SoftEther VPN на Windows. SoftEther VPN позволяет объединить в сеть различные устройства, так как поддерживает практически все популярные протоколы сетей.
Настройка SoftEther VPN топология клиент-сервер.
VPN сервер здесь будет центральным узлом, к которому будут подключаться клиенты для получения доступа во внутреннюю сеть. Скачиваем последнюю RTM версию и запускаем установку. Выбираем строчку SoftEther VPN Server и жмем далее.

Тут ставим галочку Remote Access VPN Server.

Затем вводим имя виртуального хаба.

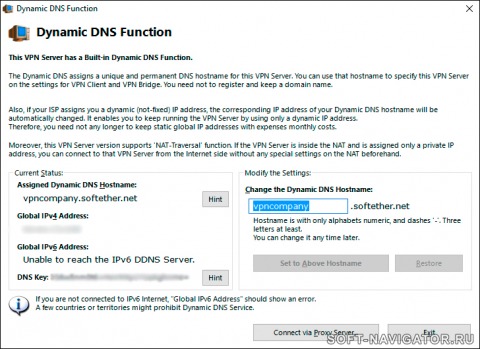
Далее идет настройка функции динамического DNS, ее можно отключить позже.

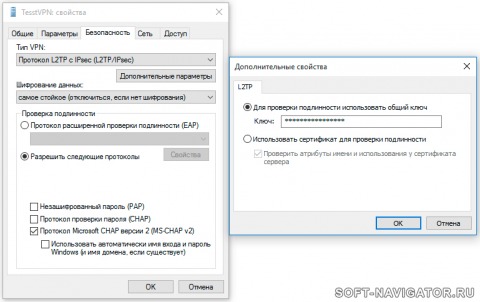
Затем, если необходимо, то настраиваем подключение по L2TP, указываем общий ключ IPsec.

Далее идет настройка Azure VPN — это бесплатный облачный сервис, который позволяет устанавливать VPN соединение с сервером при отсутствии внешнего ip адреса и открытых портов. Для соединения через него, необходимо указывать доменный идентификатор Azure VPN и 443 порт.

На последнем шаге нужно указать физический сетевой интерфейс, который подключен к локальной сети.

Теперь можно настроить учетные записи и прослушиваемые TCP порты в виртуальном хабе . Порт 5555 удалять нельзя, т.к. через него подключается локальный клиент управления сервером. О том как открыть нужные порты в роутере можно прочитать в статье.


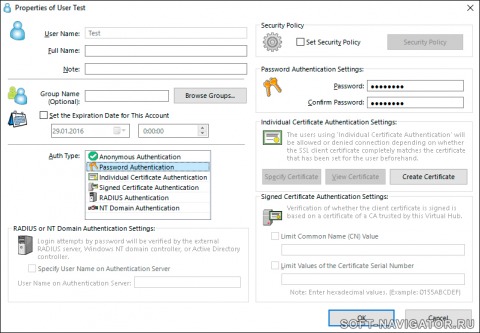
Для того что бы настроить учетные записи нажимаем Manage Virtual Hub, затем Manage Users, создаем нового пользователя. Вводим имя, а также задаем тип аутентификации. Поддерживаются следующие виды аутентификации: анонимный, пароль, индивидуальный сертификат, подписанный сертификат, аутентификация через сервер RADIUS и контроллер домена Windows NT. Для примера, создадим пользователя Test с парольной защитой.

Настройка VPN клиентов.
На клиентском компьютере настроим подключение по протоколу L2TP/IPsec с общим ключом.

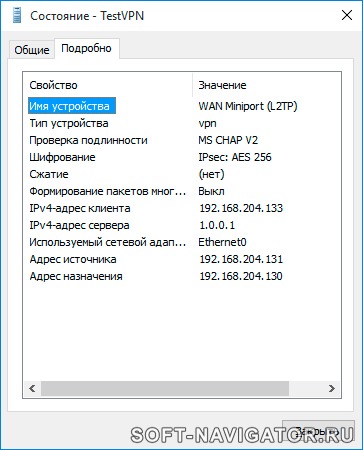
По умолчанию клиентам присваиваются IP адреса того же диапазона DHCP сервера, к которому подключен VPN сервер.

Нельзя не отметить, что у SoftEther VPN имеется собственный VPN клиент, который по заявлению разработчика работает быстрее и шифрует трафик с помощью SSL. Таким образом, его трудно отличить от HTTPS, следовательно, VPN будет работать даже в сетях где другие протоколы заблокированы.
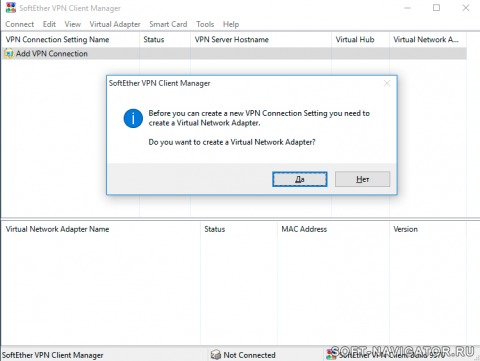
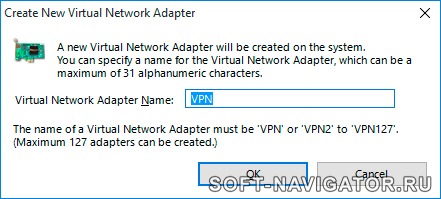
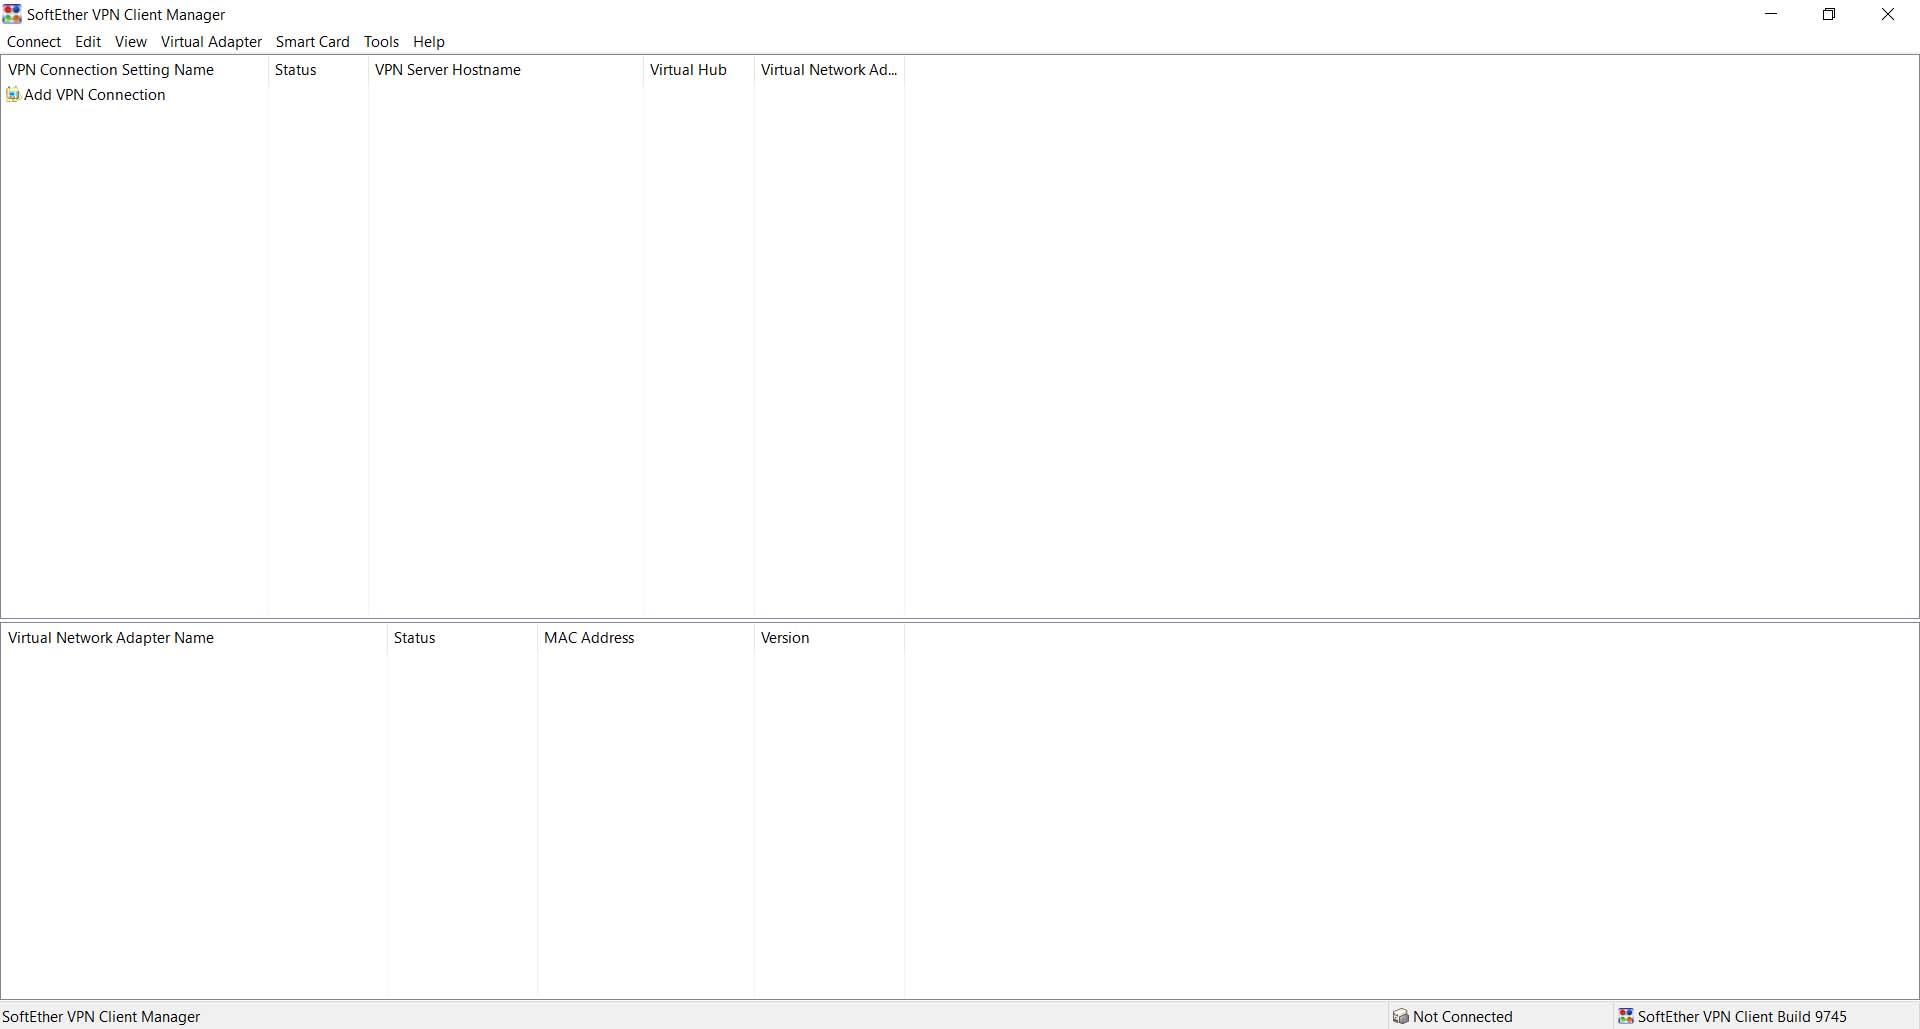
Установка и настройка собственного клиента довольно проста. После стандартной инсталляции клиента нажимаем пункт Add VPN Connection и соглашаемся создать виртуальный сетевой адаптер.
Далее пишем имя адаптера.

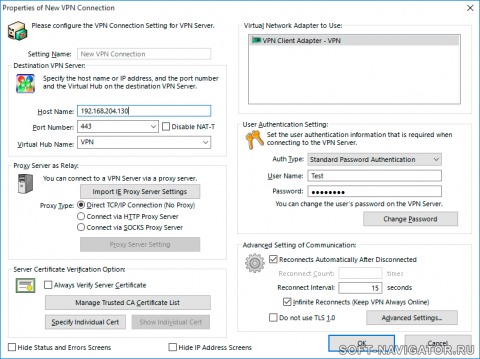
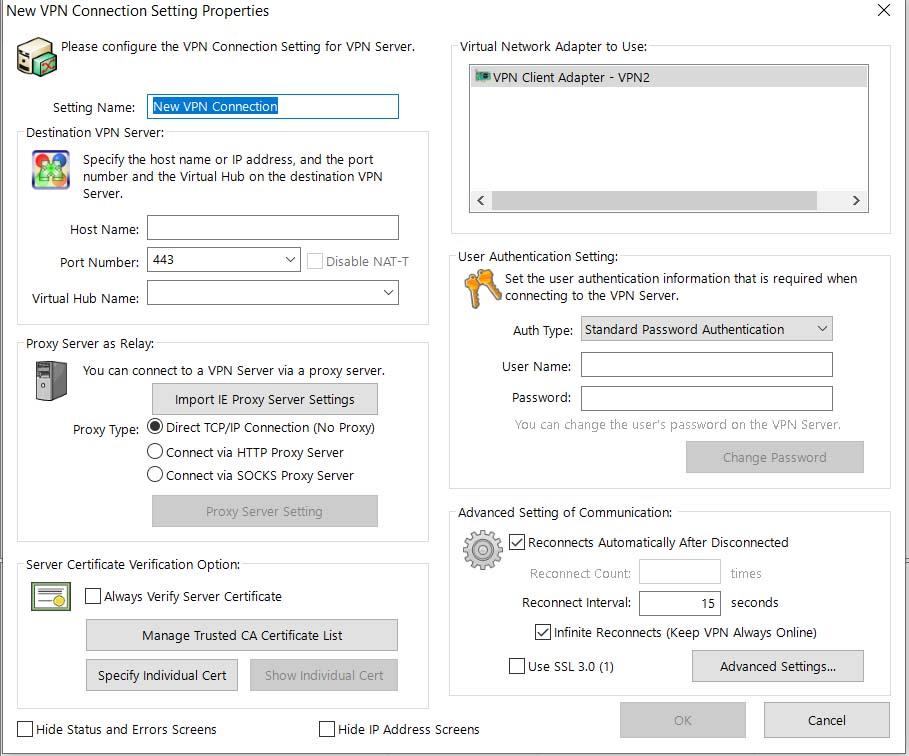
Затем появится окно создания нового VPN подключения, указываем здесь адрес сервера, порт, имя виртуального хаба на сервере и учетные данные пользователя.

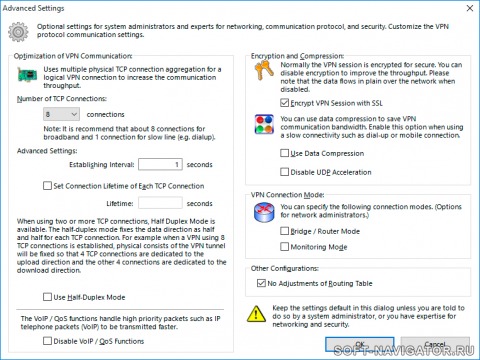
Если вдруг, при подключении VPN соединения локальная сеть становится неопознанной, то необходимо нажать Advanced Settings (см. картинку выше) и поставить галочку No Adjustments of Route Table. Также можно изменить приоритеты сетевых подключений, подробнее в статье.
На этом всё, спасибо за внимание.
СофтЭтер ВПН это многопротокольное программное обеспечение VPN, которое мы можем использовать в таких операционных системах, как Windows, Linux или macOS, среди прочего. Его название происходит от программного обеспечения Ethernet. Это открытый исходный код и совершенно бесплатно. Это альтернатива другим опциям, таким как OpenVPN и Microsoft сервера.

Он считается более быстрым вариантом, чем OpenVPN, и следует также отметить, что он совместим с Microsoft SSTP VPN для разных версий Windows. У него есть собственный протокол: SSL VPN . Он полностью оптимизирован для этого инструмента, предлагая очень высокую производительность, низкую задержку и брандмауэр сопротивление.
Позволяет виртуализировать Ethernet с помощью программного перечисления. SoftEther VPN-клиент реализует виртуальную Cеть Адаптер и SoftEther VPN-сервер реализует виртуальный коммутатор Ethernet. Мы легко можем создать удаленный доступ VPN и межсайтовый VPN , как расширение L2 VPN на базе Ethernet. Он также позволяет создавать традиционные VPN на основе L3 с IP-маршрутизацией.
SoftEther VPN полностью совместим с самыми популярными на сегодняшний день продуктами VPN во всем мире. Он может взаимодействовать с OpenVPN, L2TP, IPsec, EtherIP, L2TPv3, маршрутизаторами Cisco VPN и клиентами MS-SSTP VPN. В настоящее время это единственный в мире, который поддерживает SSL-VPN, OpenVPN, L2TP, EtherIP, L2TPv3 и IPsec в качестве единого программного обеспечения VPN.
SoftEther основные особенности
Мы видели, что такое SoftEther, и теперь посмотрим, что в нем основные черты находятся. Обзор моментов, которые мы должны учитывать при использовании этого программного обеспечения. Мы уже упоминали о некоторых аспектах, например о том, что он бесплатный и с открытым исходным кодом.
- Простота создания сетей VPN типа «сеть-сеть» и удаленного доступа.
- SSL-VPN-туннелирование через HTTPS для прохождения через NAT и межсетевые экраны
- Инновационные функции VPN через ICMP и VPN через DNS
- Он устойчив к брандмауэрам с жесткими ограничениями.
- Интегрированный динамический обход DNS и NAT, поэтому статический или фиксированный IP-адрес не требуется
- 256-битное шифрование AES и 4096-битное шифрование RSA
- Функции безопасности, такие как VPN-туннель и реестр
- Высокая производительность с 1 Гбит / с при небольшой загрузке памяти и ЦП
- Поддерживает, среди прочего, Windows, Linux, macOS, iOS или Android.
- Поддержка SSL-VPN (HTTPS) и шести основных протоколов VPN (OpenVPN, IPsec, L2TP, MS-SSTP, L2TPv3 и EtherIP)
- Функция клонирования OpenVPN поддерживает устаревшие клиенты OpenVPN
- IPv4 и IPv6
Вкратце, это основные функции SoftEther. Этот мультиплатформенный сервер и клиентское программное обеспечение VPN предлагает широкий спектр возможностей. Он имеет отличную производительность в различных операционных системах, с которыми он совместим.
Как установить SoftEther в Windows
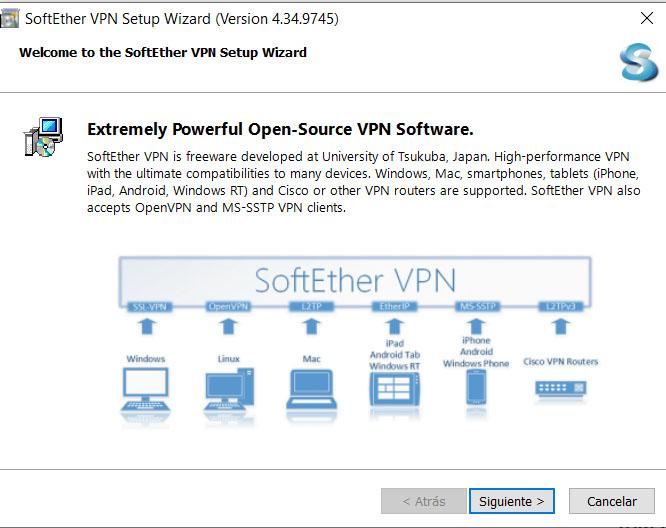
Мы объясним шаг за шагом как установить SoftEther в Windows. Мы собираемся протестировать его в наиболее часто используемой операционной системе на настольных компьютерах, хотя следует отметить, что процесс его установки и использования аналогичен в остальных операционных системах, где мы можем его использовать.
Первое, что нам нужно сделать, это перейти в раздел загрузки его Официальном сайте . Там мы найдем различные варианты загрузки программы. У нас также есть ссылка на GitHub, и мы можем ознакомиться с исходным кодом программного обеспечения. Есть несколько серверов, с которых его можно скачать.

Имейте в виду, что мы можем скачать сервер, клиент, вариант моста, а также выбрать платформу. В установочный файл составляет около 50 МБ. После того, как мы его загрузили, следующее, что нам нужно сделать, это запустить его в системе. Вы начнете с установки, простого и интуитивно понятного процесса. Он запросит у нас разрешение на его установку, и мы должны его принять.

После того, как мы установили и запустили его в первый раз, появится окно, подобное тому, которое мы видим на изображении ниже. Мы должны ударить Поисковик чтобы начать его использовать. Он запросит у нас пароль администратора.

Если мы хотим создать удаленный VPN-сервер с SoftEther мы должны отметить эту опцию в новом окне, которое откроется позже, и нажать «Далее». Он запросит у нас подтверждение, и мы примем его. Нам также нужно будет придумать имя.

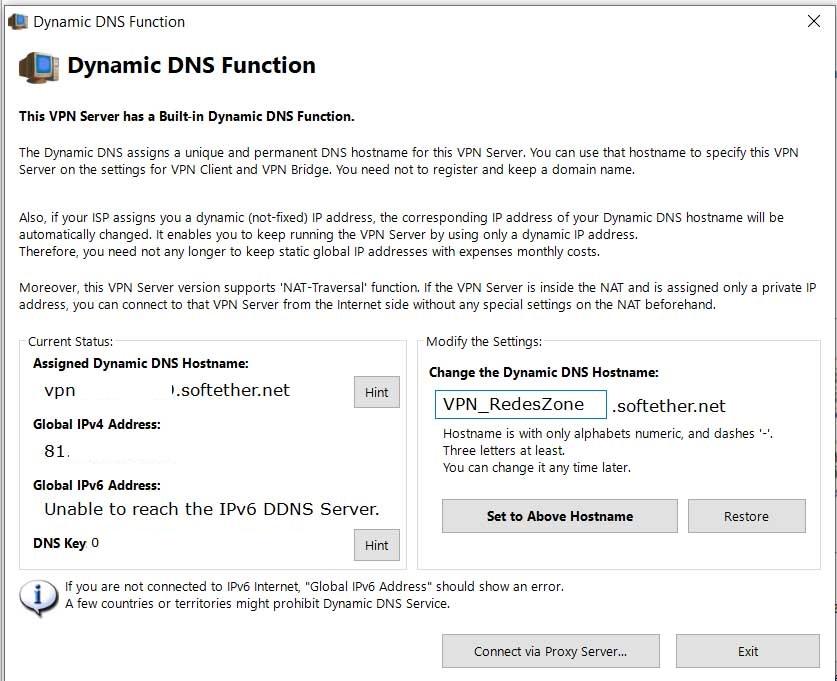
Как только это будет сделано, он создаст динамический DNS функция для нас. Он назначит имя хоста, глобальный адрес IPv4 и все, что мы видим на изображении ниже. Мы можем изменить имя и назначить то, которое хотим. Мы нажимаем Set to Above Hostname.

После создания мы должны дать ему выйти, и в появившемся окне отметьте опцию Включить функцию сервера L2TP (L2TP через IPsec). Вы также должны выбрать имя пользователя, но поскольку у нас будет только один созданный, он уже будет отмечен по умолчанию. Даем ОК.

В следующем окне мы даем вам отключить VPN Azure и снова отметьте ОК. После этого мы создаем нового пользователя и заполняем соответствующие данные. Мы должны указать имя и тип аутентификации, в основном, в дополнение к паролю.

В новом окне мы автоматически увидим, что созданный нами пользователь уже появляется. Мы можем просто закрыть это окно, нажав Exit и в предыдущем окне на шаге 3 выбрать Контроллер Ethernet и близко. Мы можем проверить, что статус находится в сети, как показано на изображении ниже.

Если мы выберем пользователя и нажмем на Управление виртуальным хабом мы можем ввести различные точки, которые мы можем изменить. Мы можем щелкнуть Virtual NAT и Virtual DCHP и включить SecureNAT. Позже мы войдем в SecureNAT Configuration, и там мы увидим параметры интерфейса карты, такие как MAC-адрес или IP-адрес.
В главном окне мы видим список прослушиваемых портов TCP / IP. Мы можем создавать, удалять или приостанавливать уже существующие.
Установить SoftEther Client
Мы также можем установить клиентская версия SoftEther VPN . Процесс такой же. Мы должны зайти на их веб-сайт и на этот раз выбрать «Клиент». Вам нужно выбрать операционную систему, в которую вы хотите ее установить. Когда мы откроем его, мы обнаружим окно, подобное тому, которое мы видим на изображении ниже.

Мы должны дать Добавить VPN-соединение . Вы должны дать ему имя, и он начнет создавать новую виртуальную сеть в Windows. Это займет несколько секунд. Он автоматически появится в нижней части главного окна с созданным нами именем. Убедитесь, что статус включен.
Как только это будет сделано, вам нужно перейти в Connect, щелкнуть New VPN, и появится новое окно для ввода данных, как мы видим на изображении.

Здесь мы должны поместить такие данные, как имя хоста, которое в нашем случае, как мы его настроили ранее, будет vpnredeszone.softether.net. Также выберите порт и отключите NAT-T.
Вы должны ввести имя пользователя и пароль справа и нажать ОК. В главном окне появится офлайн-соединение. Просто щелкните правой кнопкой мыши и выберите «Подключиться», чтобы установить соединение, и появится IP-адрес. Мы увидим, что он выглядит как подключенный.
Короче говоря, следуя этим шагам, которые мы объясняли, мы можем загрузить и настроить SoftEther как сервер и клиент. Мы можем легко и безопасно создать VPN.